
Below is information on maintaining your Silhouette blades, including the following sections:
- Setting up the blade
- Loading the blade
- Finding blade settings
- Cleaning the blade
- Blade storage
- Replacing the blade
- Cautions
Loading Blade/Tools into the Machine
Loading the Blade
Prior to loading the blade into the machine, make sure your blade is set to the correct level for your job.
AutoBlades
The blade level will be adjusted by the cutting machine based on the Blade setting selected in the software.
Manual Blades
You will need to adjust the blade setting by hand prior to loading it into the cutting machine.
NOTE: All blades aside from the AutoBlade are considered Manual Blades.
Once your blade is ready:
- Load the blade by dropping it into the blade holder in the machine
NOTE: The blade should be pointing down and the flat edge of the blade housing facing toward the back of the machine. - Push the blade all the way down before locking it into place
NOTE: Hold the blade lock with one hand while pushing the blade down with your other hand. This will ensure it’s seated all the way down into the blade holder. - Lock the blade by pressing the lock lever inward
Cleaning the blade
- Remove the blade from your Silhouette machine.
- Locate the adjustment tool. Depending on your machine model, use the dedicated blade adjustment tool use the small plastic handheld tool that came in the box.
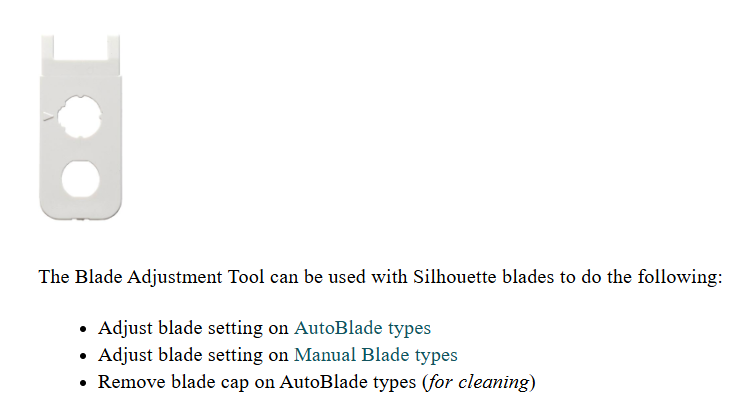
- Unscrew the white cap. Insert the tip of the AutoBlade into the adjustment tool so it aligns, and turn the blade counterclockwise to unscrew the white plastic cap.
- Clear out debris using a soft-bristled brush (like a clean toothbrush), a small paintbrush, or canned air. Gently brush away any paper dust or vinyl scraps trapped inside.
- Screw the white cap back on. Place the cap back on the blade and turn it clockwise until it is is finger-tight. Do not overtighten, as this can crack the plastic threads.
- If you havhe misplaced your adjustment tool you can also use a pair of needle nose pliers to gently unscrew or a pair of tweezers.
No, do not submerge the blade in water or use harsh liquids. Water can cause the internal spring mechanism to rust. If you have stubborn adhesive residue on the blade tip, you can lightly dampen a cotton swab with 91% isopropyl alcohol, carefully wipe the metal tip, and let it dry completely before reassembling.
You should clean your blade every few projects, or immediately after cutting fibrous materials like heavy cardstock, glitter paper, or fabric. If you notice your machine skipping cuts, clean the blade right away.
If your cuts are suddenly jagged, tearing, or not going all the way through the material—even after you have cleaned out all debris and increased your thickness/force settings—it is likely time to replace the blade.
Troubleshooting Common Issues
If your machine is clicking but the red line inside the blade adjustment window isn't moving to the correct number, check the following:
- Is the blade fully seated? Make sure the blade is pushed all the way down into the tool holder before locking it. If there is a gap, the machine cannot push the cap down to adjust the depth.
- Is the cap loose or crooked? Check if the white plastic cap was screwed back on completely straight. If it is loose or cross-threaded, the auto-adjustment mechanism won't align properly.
- Is debris trapped inside? A buildup of paper dust can physically block the blade from extending or retracting. Take the cap off and clean it out.
- Does your blade carriage need reset?
Blade lifespan varies wildly based on use. Cutting abrasive materials like glitter cardstock, glow-in-the-dark vinyl, or heavy magnet sheets will dull the blade much faster than standard matte vinyl or printer paper
Common Loading Issues
Cutting issues can be encountered if the blade is not properly loaded. The most common blade-loading issues are:
- Loading the blade into the machine upside down (tip is pointing upward)
- Not locking the blade into place
- Locking the blade into place before it is seated all the way down into the blade slot
These actions can cause the machine to cut poorly or not cut anything at all.
Other Languages